2.5.4 Managing PlatiOnline interface users: Diferență între versiuni
| Linia 45: | Linia 45: | ||
Depending on the user type, the system will send along with the account information the following information: | Depending on the user type, the system will send along with the account information the following information: | ||
| − | For “customer support” user type – it also sends the user interface manual | + | For “customer support” user type – it also sends the user interface manual, for “tech” user type – it also sends technical documentation for website integration |
After setting up an user account, you can review and edit the previously entered information. | After setting up an user account, you can review and edit the previously entered information. | ||
Versiunea de la data 14 iulie 2012 18:50
Managing interface user types includes the following operations:
- Setting up user type classes according to access level or work requirements (owner, customer support, technical department etc)
- Editing previously entered information (name, address, email)
- User activation or deactivation
Managing user type classes involves having and logging in with an Owner account. To access and manage information regarding PlatiOnline interface users, follow these steps:
1 Access owner account at https://comercianti.plationline.ro/ by using the Login ID and password supplied by PlatiOnline
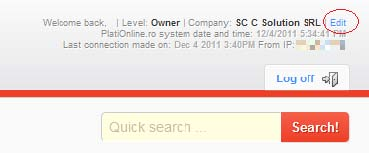
2 Access Edit link (top right of the home page)
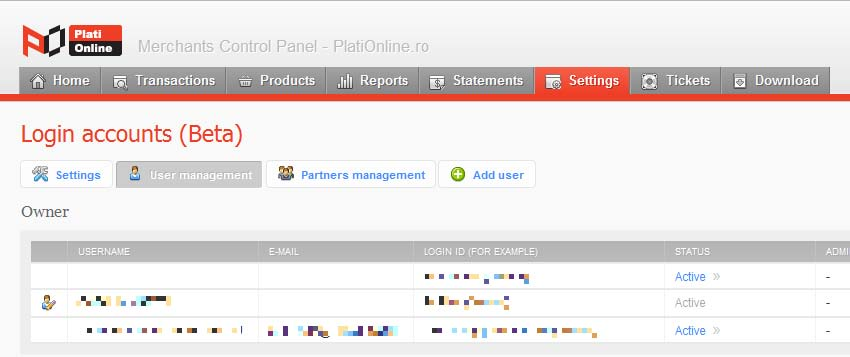
Or the User management link from the Settings tab:
A list of users will be displayed, each section containing one user class type. Each section has 5 columns with the user info (username, email, login ID, status).
To create a new user:
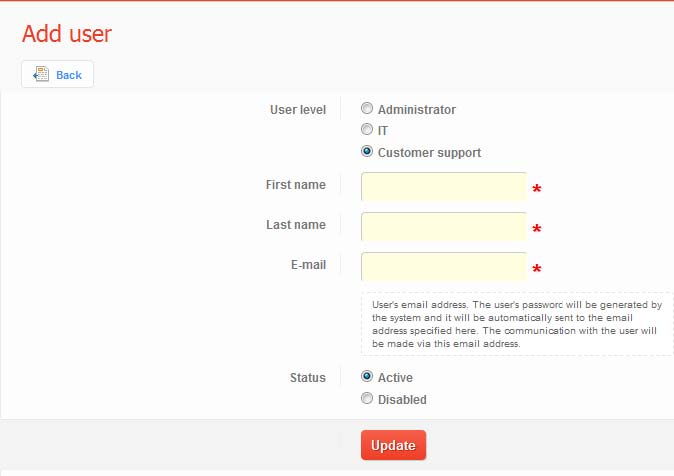
1. Click on Add User button.
2. Select User type class
3. Fill in required data (first and last name, email address)
4. Select the status of the user account (if you set it to Inactive, you can later change it to Active)
5. Click Update.
The system will automatically generate a password that will be sent to the user’s email along with the account information. Any subsequent updates or communication with the user will be sent to the email address specified in the user setup process.
Depending on the user type, the system will send along with the account information the following information:
For “customer support” user type – it also sends the user interface manual, for “tech” user type – it also sends technical documentation for website integration
After setting up an user account, you can review and edit the previously entered information.
To change the user information:
1 Click the icon
2 Change desired information
3 Push Save button.
4 Click the Email button to send the new data to the user


